Preparing for Refinishing: Understanding the Process and Gatherings Materials
So, you've decided it's time to give your beloved guitar a makeover? Well, get ready for a journey into the wacky world of refinishing! Before you embark on this colorful adventure, it's crucial to understand the process and gather the necessary materials. Think of it as preparing for a guitar beauty pageant. First things first, you'll need to remove all the hardware, like unhooking a fancy dress from its hanger. Then comes the sanding, which is basically giving your guitar a skin exfoliation session. Don't forget to wear a mask, unless you fancy sneezing sawdust for the next few days! After sanding, it's time to paint, and this is where things get really exciting. Just picture yourself as a Picasso of guitars, wielding a paintbrush instead of a paint tube. Oh, and don't even get me started on the color options available! So, grab your apron, goggles, and unleash your inner Picasso—your guitar will thank you for the makeover that will make all other instruments green with envy!
Stripping the Guitar: Removing Old Finish and Prepping the Surface
An interesting fact about how to refinish a guitar is that certain guitar finishes, such as nitrocellulose lacquer, can actually improve the sound of the instrument. The thin layers of lacquer allow the wood to vibrate more freely, resulting in a more resonant and lively tone. Many guitarists believe that a well-refinished guitar can produce a richer and more harmonically complex sound compared to guitars with thicker or less responsive finishes.
Alright, folks, get ready to witness the ultimate guitar striptease! Today, we're diving into the tantalizing world of refinishing guitars - a process as nerve-wracking as taking off your clothes in public. To get started, it's time to seductively remove that old finish. Think of it as peeling off a clingy ex's T-shirt, liberating the guitar from its dull and worn-out outer layer. Grab your trusty stripping agent and apply it generously, ensuring a thorough coverage. As you wait for the chemical magic to happen, caress the guitar's body gently, whispering sweet nothings into its f-hole. Once the finish starts to bubble and peel, grab your scraper and lovingly slide it along the curves, revealing the bare wood underneath. Don't forget to maintain eye contact with your stripped-down partner. Now, when you're both feeling exposed and vulnerable, it's time to prep that surface like a pro, gently sanding away any rough spots and imperfections. Remember, this guitar deserves a fresh new look that will make heads turn and eyes widen. So, make sure to give it the attention it deserves because, my friends, there's nothing more satisfying than seeing a guitar shine like the rock star it was destined to be.
Applying the New Finish: Techniques for Achieving a Professional Look and Protecting the Wood

So, you've finally decided to unleash your inner rock god and embark on the journey of refinishing your guitar. Kudos to you, my friend, for taking the fearless leap into the realm of DIY craftsmanship. Now, the key to achieving a professional look and protecting that beautiful wooden body lies in the magical realm of applying the new finish. Brace yourself for an adventure filled with paintbrushes, sandpaper, and an undying sense of determination.
First things first, my aspiring luthiers, grab that beloved instrument and strip away its old, worn finish like a true master of disguise. It's time to reveal the raw beauty of that wooden canvas. Armed with a trusty sandpaper and a love for the unexpected, gently sand away the old finish, removing any traces of imperfection and allowing the wood to breathe anew.
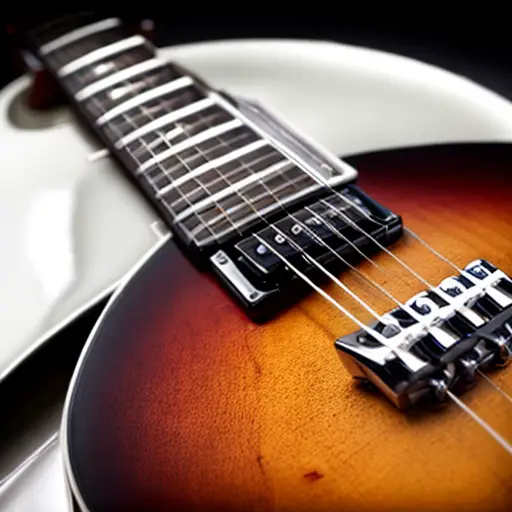
Now, before diving headfirst into the abyss of colors and lacquers, take a step back and envision the future aesthetic of your six-stringed companion. Do you dare to venture into a bold shade that would make Prince himself weak at the knees? Or perhaps a classic sunburst that pays homage to the legends of the past? The choice is yours, my friend, the world of finishes is your oyster.
With the vision firmly in your mind, it's time to unleash the true artist within. Remember, my fellow disciples of rock, the key to a flawless finish lies in patience and precision. Grab your paintbrush, dip it into the enchanting concoction of paint and thinning agent, and let the musical magic unfold. Stroke by stroke, layer by layer, transform that humble wooden frame into a work of art that will inspire countless riffs.
But hold your horses, rockstars – we're not done just yet! As the layers of divine color dry, proceed with caution as you apply a protective coat to shield your masterpiece from the perils of the rock 'n' roll world. Whether you opt for a sublime nitrocellulose lacquer or a modern polyurethane marvel, remember the importance of multiple thin coats, each one ensuring the longevity and resilience of your beloved axe.
Now, my dear aspiring guitar virtuoso, let us not forget the finishing touches that truly separate the amateurs from the pros. Sanding between each coat with the finesse of a maestro will ensure a silky-smooth finish that begs to be admired. And when the time is right, buff that beauty to a dazzling shine, allowing your reflection to whisper, 'You did it, you magnificent creator of sonic wonders.'
As our adventure in finishing draws to a close, take a step back and marvel at the transformation you've achieved. With passion and dedication, you've not only revitalized a tired instrument but also unlocked a world of possibilities. From the humble beginnings of a neglected wooden body to a guitar radiating with the essence of your unique style, you, my friend, have become the master of your sonic destiny.
So, go forth, armed with knowledge and a sense of humor, and may your journey in refinishing guitars be filled with laughter, self-discovery, and, of course, rocking out like there's no tomorrow. After all, it's not just about protecting the wood – it's about unleashing the true potential that lies beneath the surface.
Final Steps and Tips: Sanding
Fun fact: Did you know that professional guitar refinishing can significantly increase the value of vintage guitars? In some cases, a well-executed and historically accurate refinishing job can even double or triple the market price of certain rare and sought-after guitars! So, if you happen to stumble upon a beat-up old guitar with potential, a little refinishing know-how could potentially turn it into a hidden treasure worth a small fortune!
Alright folks, we're almost there! Just a few more steps until your beloved guitar is shining like a rockstar's smile. Now, let's talk about sanding - the process that can either make you feel like a zen wood whisperer or a frustrated lumberjack in desperate need of a spa day. First things first, find yourself some sandpaper with different grit sizes. Start off with a coarse grit to remove the old finish, and then gradually work your way up to finer grits, treating your guitar like the delicate diva it is. Take your time, be gentle, and remember, this is a guitar, not an ex's car – no need to go too crazy with scraping. Once you've achieved a smooth surface, take pride in your sanding skills, and let out a big sigh of relief. You did it, my friend! Pat yourself on the back, because you just conquered the sanding stage, and now it's time for the grand finale – the mesmerizing world of finishing touches.